+86-13516964051


How to Use a Vacuum Brake Bleeder: A Practical Introduction
A soft brake pedal can signal air in the hydraulic system, but it can also point to other problems. A Vacuum Brake Bleeder helps draw fluid and trapped air through a bleed screw. Used carefully, it can make routine bleeding more manageable for a home mechanic. It is not a cure-all.
Before starting, check the vehicle’s service manual for the correct bleeding sequence and brake fluid specification. Park on a level surface, secure the vehicle, and protect painted areas from fluid. Brake fluid can damage paint. Wear eye protection and gloves, and keep the reservoir from running low; letting it empty may pull more air into the system.
The basic process is straightforward: connect the bleeder hose snugly to the screw, create vacuum, then open the screw slightly while watching the fluid move through the clear hose. Small bubbles may appear because air can leak around the screw threads, not only from the brake line. That detail is easy to misread. Tighten the screw before releasing vacuum, and check the reservoir often. Follow the tool maker’s instructions, since designs and recommended vacuum levels vary. If the pedal remains spongy, fluid leaks, or the procedure does not match the manual, stop and investigate rather than assuming the job is finished. A careful check matters more than speed.
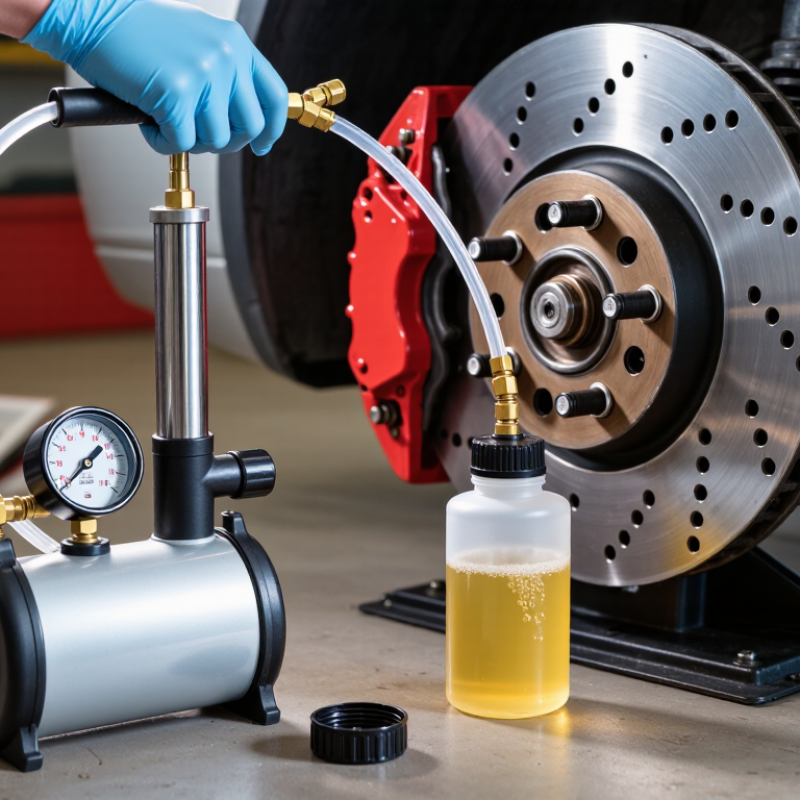
How to Use a Vacuum Brake Bleeder?
Selecting the specified brake fluid is the first safety decision. FMVSS No. 116 sets DOT 3 minimum boiling points at 205°C dry and 140°C wet. These figures come from standardized tests, not normal reservoir temperatures. “Dry” describes unused fluid, while “wet” reflects moisture-contaminated fluid after service exposure. That difference matters because glycol-based brake fluid absorbs water over time. NHTSA’s standard treats boiling performance as a critical protection against vapor formation during heavy braking.
Check the vehicle service information before opening the reservoir. Use only the required fluid specification. Never substitute a different chemistry because the bottle appears similar. A clean, sealed container is essential. Brake fluid absorbs moisture from humid air quickly. Small details matter.
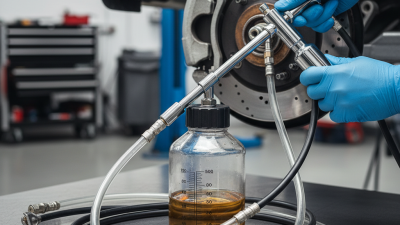
Fill the reservoir, attach a tight clear hose, and place the hose end in a collection bottle. Create steady vacuum at the bleeder screw, then open it slightly. Watch the fluid and bubbles through the hose. Close the screw before releasing vacuum, or air may return through the threads. Move from the manufacturer’s recommended wheel sequence, not a guessed pattern. Keep the reservoir above its minimum mark throughout the process. If it empties, air enters the master cylinder, creating extra work.
One practical warning: vacuum bleeding can show false bubbles around loose threads. I once trusted a foamy stream too quickly; the pedal still felt soft. Recheck the hose seal, inspect for leaks, and confirm a firm pedal before driving. A pressure or manual bleed may be more reliable when persistent air remains.
A vacuum brake bleeder draws old fluid and air from the bleeder screw while fresh fluid is added to the reservoir. The chart shows the minimum dry and wet boiling-point requirements established by FMVSS No. 116. DOT 3 requires a minimum dry boiling point of 205°C and a wet boiling point of 140°C. Always use the fluid specification listed by the vehicle manufacturer and keep the reservoir from running dry during bleeding.
Prepare the vehicle on level ground and support it securely with approved stands. Never rely on a jack alone. Remove dirt around the master-cylinder reservoir before opening it. Check the service manual for the correct brake-fluid type.
Fresh fluid matters because old fluid can absorb moisture and reduce braking performance. Keep the reservoir partly filled during bleeding. If it becomes empty, air can enter the master cylinder.
Fill the bleeder reservoir if required, then connect its clear hose firmly to the wheel-cylinder or caliper bleeder screw. Create steady vacuum before loosening the screw slightly. Watch the hose closely. Small bubbles may appear at first. Allow fluid to flow until it looks clean and bubble-free, then tighten the screw before releasing vacuum.
Wipe spilled fluid immediately because it can damage painted surfaces. Repeat the process at each wheel according to the vehicle’s service sequence. Short, controlled strokes work better than aggressive pumping.
Do not trust appearance alone. A firm pedal is essential.
I once focused too much on clear fluid and overlooked a loose hose connection. That mistake pulled air into the line again.
Check every fitting, refill the reservoir, and test pedal pressure with the engine off. If the pedal still feels soft, stop driving and inspect the system or seek qualified assistance. A vacuum bleeder saves time, but it cannot correct a damaged hose, leaking seal, or faulty component.
How to Use a Vacuum Brake Bleeder?
Connect the Bleeder and Apply Vacuum Within the Tool Maker’s Specified Range
Park on level ground, secure the vehicle, and verify the correct brake fluid. Wear gloves and protect painted surfaces from spills. Remove the reservoir cap, then keep the fluid above the minimum mark during bleeding.
Connect the bleeder hose tightly to the wheel cylinder or caliper nipple. A loose connection can draw air around the threads and imitate trapped air. Open the nipple slightly, then create vacuum within the tool maker’s specified range. Do not guess from the gauge. Excessive vacuum may aerate the fluid or empty the reservoir quickly. Watch the hose. Clear fluid should replace darker fluid, with fewer bubbles.
Bleed the wheel sequence stated in the service information. Check the gauge repeatedly, because vacuum can fall as the seal changes. Tighten the nipple before releasing vacuum, then clean the area and inspect for leaks. The pedal should feel firm after several controlled applications.
NHTSA’s 2022 Traffic Safety Facts recorded 42,514 fatal crashes in the United States. That figure does not prove brake bleeding caused any crash, but it reinforces careful maintenance. SAE service guidance also stresses contamination control and correct hydraulic procedures. I once found a “soft pedal” caused by a loose hose connection, not remaining air. It was an avoidable mistake. Recheck every connection.
| Stage | What to Do | Useful Check | Why It Matters |
|---|---|---|---|
| 1. Confirm the procedure | Check the vehicle service information for the correct bleeding sequence, fluid specification, and any ABS-specific procedure. | Use only the brake-fluid type specified on the reservoir cap or in the vehicle manual. | Bleeding order and ABS requirements vary by vehicle; using the wrong fluid can damage system components. |
| 2. Prepare the vehicle | Park on a level surface, secure the vehicle, and support it with properly rated stands if wheel access is needed. Clean around the master-cylinder reservoir cap. | Keep the reservoir filled with fresh, specified fluid throughout the procedure. | If the reservoir runs low, air can enter the hydraulic system and require additional bleeding. |
| 3. Connect the bleeder | Attach the bleeder’s collection hose securely to the bleed screw. Connect the tool to its vacuum source and check that hoses and fittings are seated. | Place the collection container upright and route the hose so fluid can flow without kinks. | A secure connection helps reduce fluid spills and air leaks at the tool fittings. |
| 4. Apply vacuum | Open the bleed screw as directed for the vehicle, then apply vacuum gradually and keep it within the tool maker’s specified operating range. | Do not exceed the tool’s stated limit. There is no single vacuum setting that applies to every bleeder and vehicle. | Following the tool specification helps maintain controlled fluid flow and avoids relying on an unsuitable universal setting. |
| 5. Draw fluid through | Allow fluid to flow into the container while watching the reservoir level. Refill with fresh fluid before the level approaches the minimum mark. | Use fresh fluid from a clean, sealed container; avoid reusing fluid collected during bleeding. | Brake fluid absorbs moisture, and keeping the reservoir topped up prevents air from being drawn into the system. |
| 6. Interpret bubbles | Watch the fluid in the hose. If bubbles persist, check the hose connection and bleed-screw threads, then follow the vehicle procedure before continuing. | Vacuum bleeding can draw air past bleed-screw threads, so bubbles in the hose do not always mean air remains in the brake circuit. | Distinguishing tool-side air from system air helps prevent unnecessary bleeding or incorrect conclusions. |
| 7. Close and verify | Close the bleed screw as specified before disconnecting the hose. Refit the cap, clean any spilled fluid, and check the pedal and system for leaks. | The brake pedal should feel firm and consistent. Do not drive if it feels soft, sinks, or braking performance is uncertain. | A final inspection helps identify leaks or an incomplete bleed before the vehicle is returned to service. |
How to Use a Vacuum Brake Bleeder?
A vacuum bleeder removes old fluid through each wheel’s bleeder screw. The correct sequence matters more than speed. Check the vehicle maker’s service manual before opening any screw. Some systems require the farthest wheel first, while others use a different order. Keep the reservoir filled with the specified fluid. Letting it run dry introduces air and forces you to restart.
Attach clear tubing firmly, then create a steady vacuum. Open the screw slightly and watch the hose. Small bubbles may come from the threads, not the hydraulic line. Apply sealing grease around the threads only when approved by the service procedure. Bleed the wheel until fresh fluid flows without visible bubbles. Do not judge cleanliness by color alone. Flush the required volume, then close the screw before releasing vacuum.
Federal Motor Vehicle Safety Standard No. 116 lists wet boiling points of 140°C for DOT 3, 155°C for DOT 4, and 180°C for DOT 5.1 fluids. Moisture reduces braking-system heat tolerance. That is why clear fluid and correct fluid specification both matter. I have seen technicians stop too early after a few clean drops. That saves time, but it can leave contaminated fluid in the caliper. Recheck the reservoir level, inspect every fitting, and test pedal firmness before driving. A soft pedal means the job is not finished.
After vacuum bleeding, the master-cylinder reservoir is still the weak link. Keep fluid above the MIN mark throughout the job; an exposed inlet can draw air back into the hydraulic circuit. Use the exact fluid grade listed on the reservoir cap or in the service manual, from a clean, sealed container. Small detail, big consequence.
NHTSA’s Federal Motor Vehicle Safety Standard No. 116 sets minimum boiling points for brake fluid: DOT 3 is 205°C dry and 140°C wet, while DOT 4 is 230°C dry and 155°C wet. These figures are not permission to substitute fluids. Follow the vehicle specification, and never pour used fluid back from the bleeder bottle.
With the engine off, press the pedal several times to use up stored booster vacuum, then hold steady pressure. It should feel firm, not slowly sink. Inspect bleeders, hose connections, and calipers for wetness; top up the reservoir and refit its cap. Start the engine: a modest pedal drop can occur as brake assist engages. If the pedal stays soft, travels unusually far, or sinks under steady pressure, do not drive. Recheck the bleeding or have a qualified technician inspect the system. No bubbles alone do not prove the job is complete.